kokis or rosette cookies are a traditional Sri Lankan savoury treat that adorns every Sinhalese/Tamil New Year table.
Here’s my kokis recipe and a step-by-step guide for the absolute beginner.
It’s the first New Year’s food my kids grab onto and look forward to when we get a tray of Avurudu food platters from our neighbours.
Biting into crispy rosettes is always a pleasure.
I have tried my best to make this recipe post as detailed as possible.
Even the tiny tips which can make all the difference in getting the recipe right the first time.
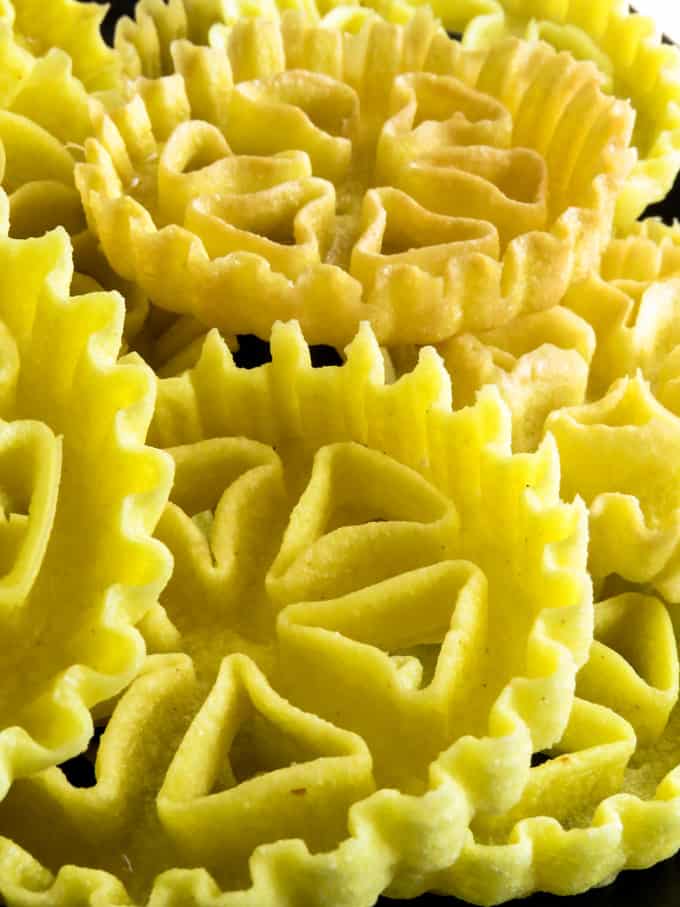
Kokis variations you can try
- Dust castor sugar over the rosettes to give them a sweeter flavour. These rosettes can be great as Christmas cookie treats!
- Drizzle a bit of treacle over the kokis at the time of serving.
- Dip it into a bowl of chocolate sauce, I bet the kids would love it, you can also use white chocolate.
- Add a few teaspoons of chilli powder to make a spicier version.
Save the recipe to Pinterest
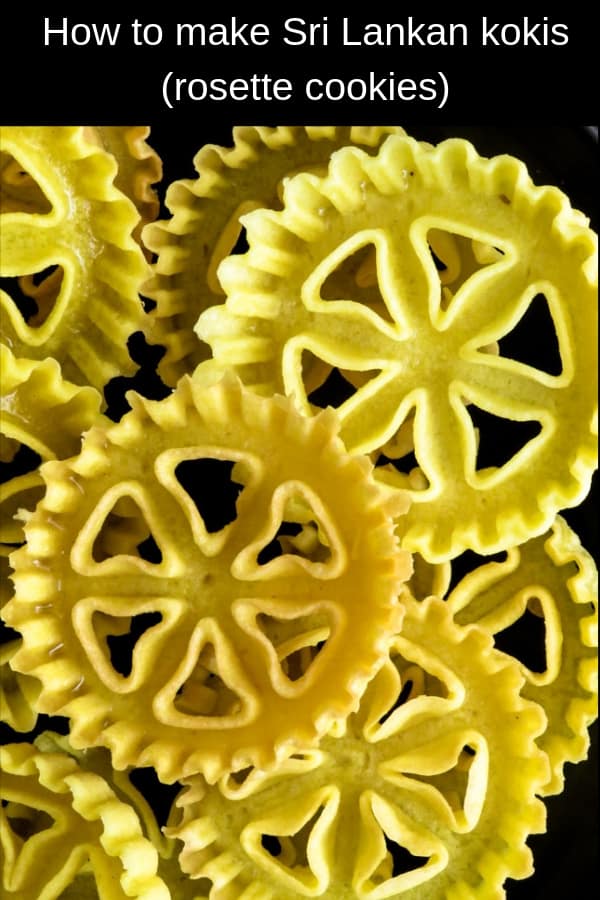
Utensils and appliances needed
- Large bowl to mix the batter.
- A medium-sized deep thachi(frying pan).
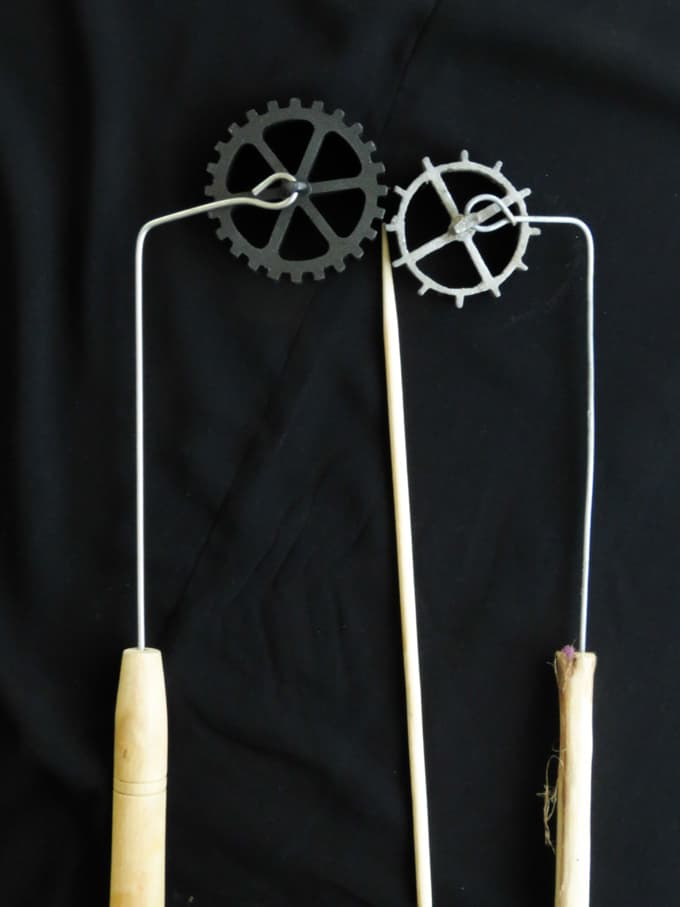
- A kokis iron mould/rosette mould (image below).
- A wooden stick with a pointed end.
- Platter with paper towels.
Workflow to make kokis/rosette cookies.
- Make the batter.
- Heat the oil, and dip the mould into the batter.
- Fry the kokis in heated oil.
- Transfer to paper towels.
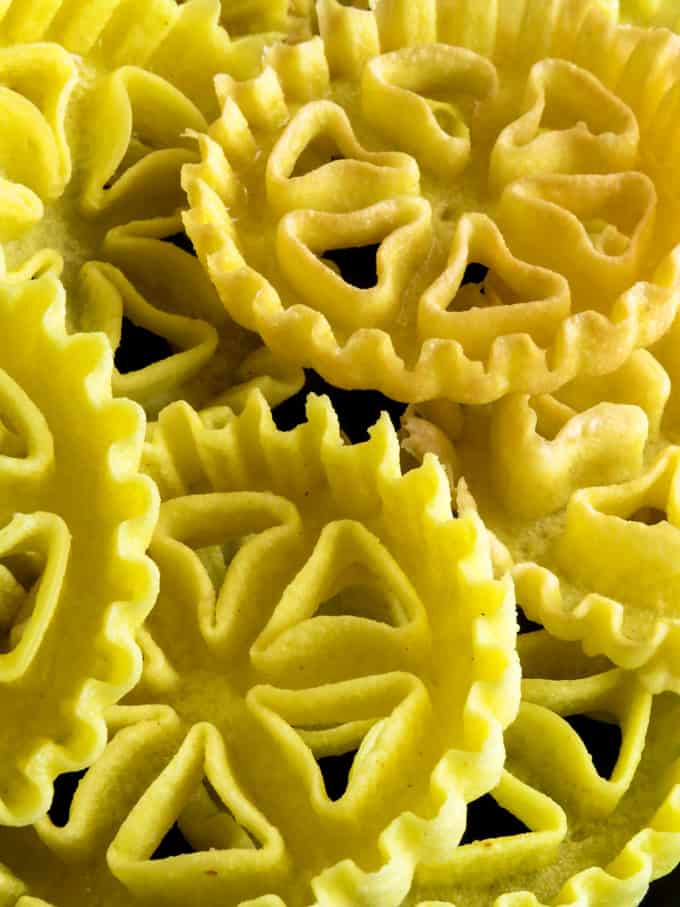
How to choose the kokis/rosette mould.
- There are various types of decorative moulds out in the market.
- If you are making kokis/rosette cookies for the first time, choose a rosette iron that is not intricate for the first time.
- The most difficult part of making the rosettes/kokis is removing the crispy treat from the mould while it’s still frying in the oil, so make sure the mould is basic for your first try.
- The kokis mould comes in two materials, the non-stick one and the basic rosette cast made out of iron.
- If this is your first time making the kokis/rosette, I would also advise you to get the non-stick ones.
- They are far easier to use than the latter, they need to be seasoned but not like the basic steel ones.
Seasoning the kokis/rosette mould.
The reason you need to season the mould is to make the fried kokis/rosette remove easily from the mould.
Brand-new ones tend to make this task difficult.
For this purpose, the moulds are put through a seasoning process just like your cast iron skillets.
How to season the kokis mould.
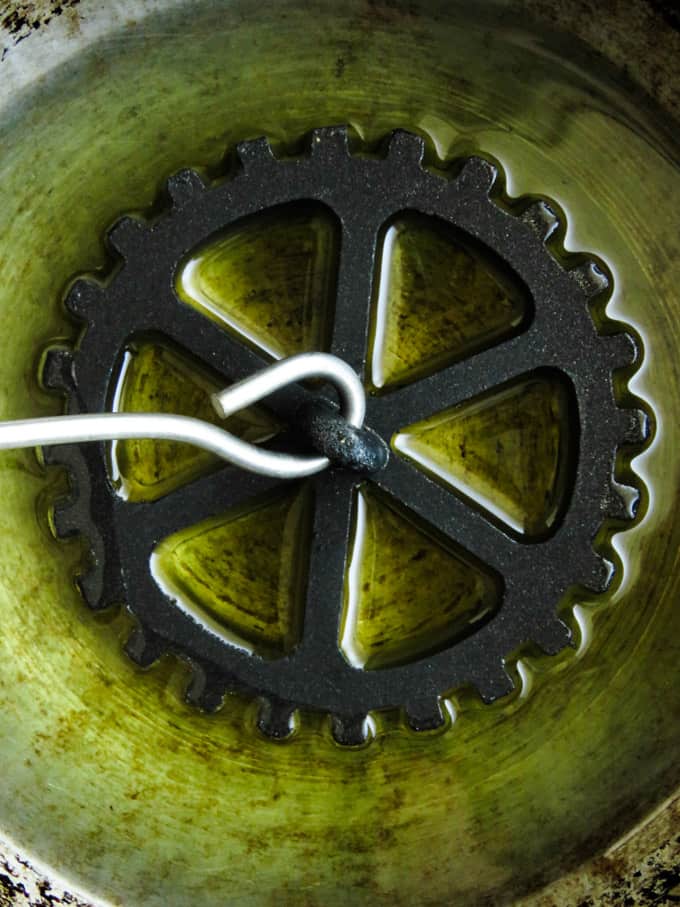
Place the pan you use for frying the rosette with oil, heat the oil over a low fire and place the mould in this hot oil, leave it for 3-5 minutes.
Once this is done take it out and let it cool, wipe with a kitchen paper towel and begin making the kokis.
MAKING the batter for kokis.
Your first step in getting the crispiest rosette cookies is getting the batter consistency.
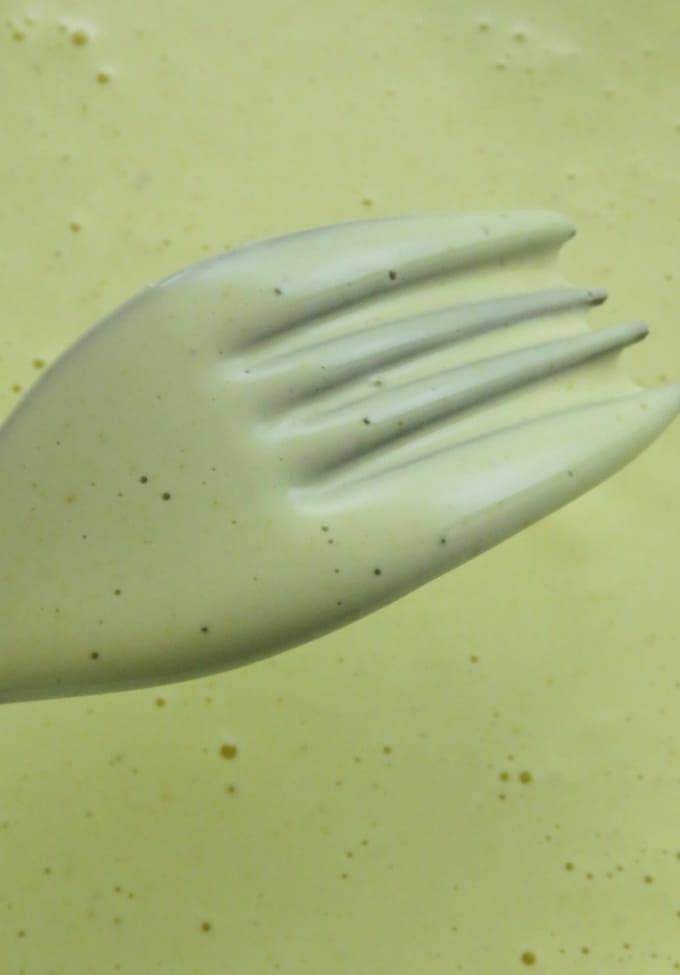
The kokis should not be like the image below.
If you make the batter too thin the batter will NOT stick to the rosette mould.
This thin consistency is what you use for crepes.
NOT THE CORRECT BATTER CONSISTENCY(BELOW IMAGE).
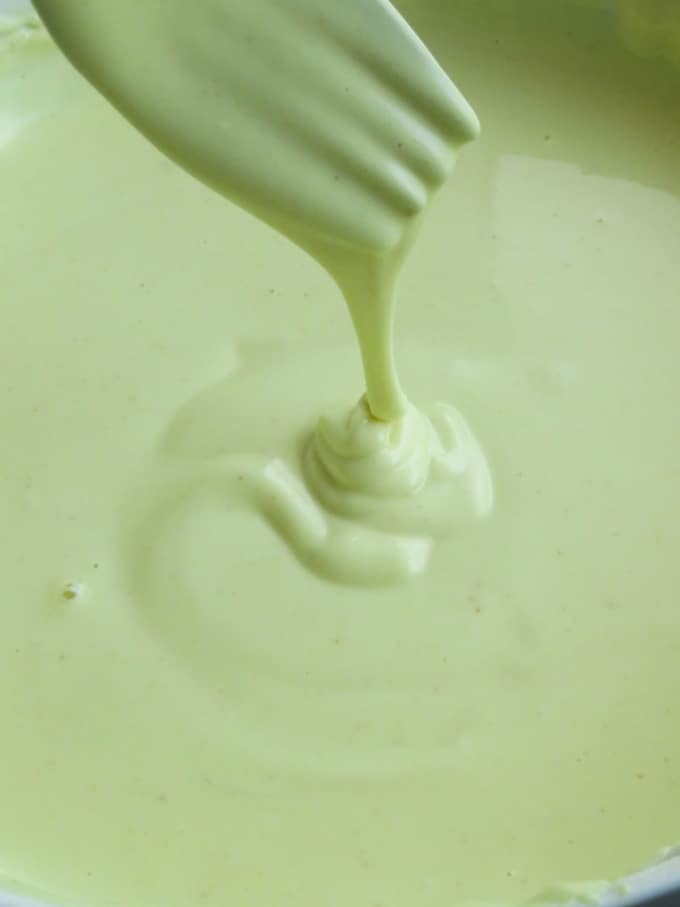
THE CORRECT CONSISTENCY(IMAGE BELOW).
The correct consistency for the batter would be as below, maybe even a bit thicker.
The batter for the kokis should be thick so that when you either dip your finger or fork, the batter should completely cover it with a thick coating
This should be the correct consistency.
Beginner’s tips for making kokis.
As easy as the recipe and ingredients look in the recipe instructions, there are a few steps that can go wrong.
Here are key areas a beginner should look out for when they are making kokis for the first time.
- Kokis batter.
- Your main goal in getting the batter correct is to help it stick onto the mould, this is why you need a thicker batter than the usual crepe batter.
- The mould.
- It is important to season the mould so the edges are smooth and the fried kokis slip off the iron rosette maker.
- For this reason, follow the instructions given above on the seasoning tips above.
- Dipping the batter.
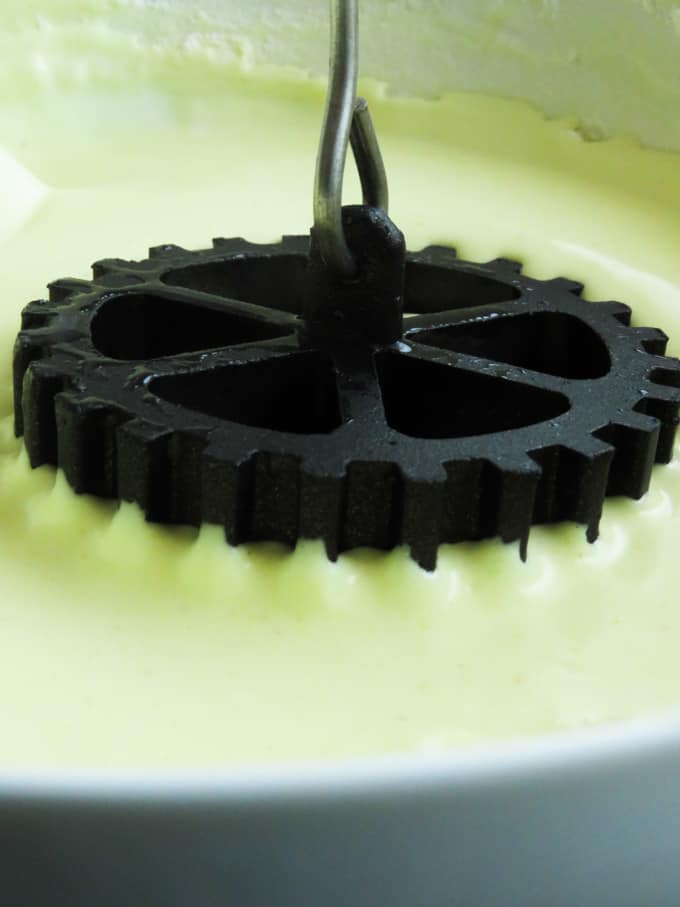
- DO NOT, I repeat do not dip the mould completely into the batter, you will not be able to remove the cookie from the mould.
- Instead, dip it halfway as shown in the image below.
- The correct heat for the kokis.
- Maintain low-medium heat to fry, do not allow the oil to smoke.
- To make the rosettes crispy than soggy, fry them over low heat until they turn a light golden colour.
- If you do find them soggy it is the result of not frying them longer.
- Removing the rosettes from the mould.
- Once you start frying, the task of removing it from the mould is the next difficulty.
- For this purpose, once the mould with batter is submerged in oil, 5-10 seconds into frying, start bobbing it up and down, this should help the rosettes fall off the moulds.
- Repeating the process(Important).
- Once you’ve made the first kokis, DO NOT DIP THE HOT MOULD INTO THE BATTER.
- This would result in the batter cooking(see image below)with the remaining heat on the mould.
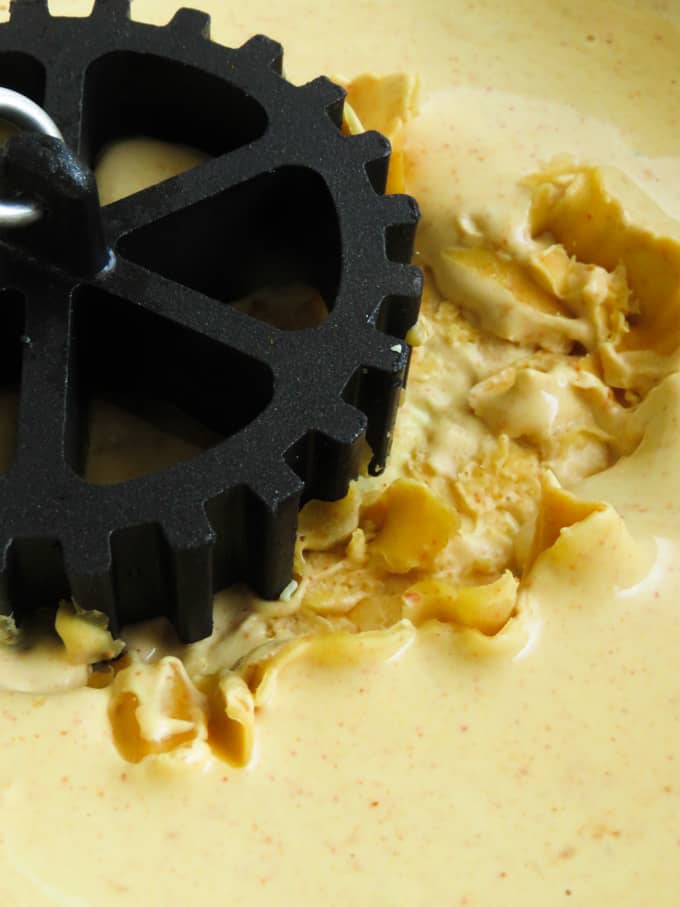
- There are two solutions to this.
- Have an extra mould so you can use them alternately, allowing the one used to cool down before dipping into the batter.
- Have a damp towel close by to cool down the mould, if you are doing it this way, make sure to reduce the temperature of the oil so that it doesn’t reach a smoking point while you cool down the mould.
Now that we’ve covered all the difficulties you might come across making kokis, go ahead and give the recipe a try.
All it takes is a little patience.
More Sri Lankan traditional recipes.
Sri Lankan milk rice(kiribath)
Sri Lankan Malay pickle(achcharu).
Sri Lankan kaliya curry(cooked ash plantain-brinjal curry).
Shredded beef fry(Sri Lankan beef fry sambol)
Sri Lankan Yellow Rice(turmeric rice)
RECIPE DIFFICULTY -LITTLE CARE IS NEEDED
The ingredients to make kokis
The ingredients mentioned below use standard measuring cups and spoons.
1 egg
1 cup thick coconut milk
1/2 teaspoon turmeric powder
2 cups of rice flour
Salt to taste
Oil as needed to deep fry(1-2 cups)
How to make kokis(rosette cookies).
Add the egg and turmeric into a bowl.
Add the egg to coconut milk, and whisk until combined well.
Add the rice flour to the egg and coconut milk mixture and mix until you have a thick batter that coats the rosette mould (read detailed notes above on batter consistency).
Season with salt.
Place a frying pan over medium heat, and dip the seasoned mould into the batter.
Make sure you don’t dip it all the way through but only half of the mould (see detailed notes above on dipping and seasoning the mould).
Once the kokis begin frying, 10 seconds into the frying, gently start bobbing the mould while it is still submerged in the oil.
You will notice the kokis slipping off, once the rosette releases from the mould, leave it to deep fry for a few minutes(3-4 minutes)until it turn golden.
Remove from oil and place in paper towels to absorb excess oil.
Before dipping the mould in the batter again make sure to cool it down if you are using just one mould (read notes above on how to do this).
As you continue making the kokis, make sure to stir the batter frequently before you dip the mould.
You will also notice the batter thinning as you use it, should this happen, add a tablespoon of rice flour to thicken the batter again.
JOIN ME ON ISLANDSMILE YOUTUBE CHANNEL
visit the NEW SEAFOOD BLOG.
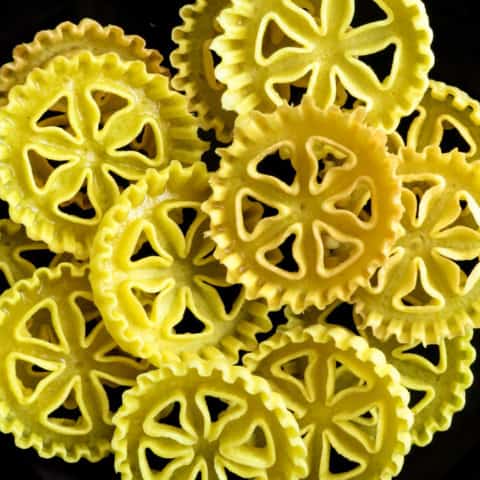
How to make kokis(rosette cookies).
kokis or rosette cookies are a traditional Sri Lankan savory treat that adorns every Sinhalese/Tamil new year table.
Ingredients
- Ingredients mentioned below use standard measuring cups and spoons.
- 1 egg
- 1 cup thick coconut milk
- 1/2 teaspoon turmeric powder
- 2 cups of rice flour
- Salt to taste
- Oil to as needed to deep fry(1-2 cups)
Instructions
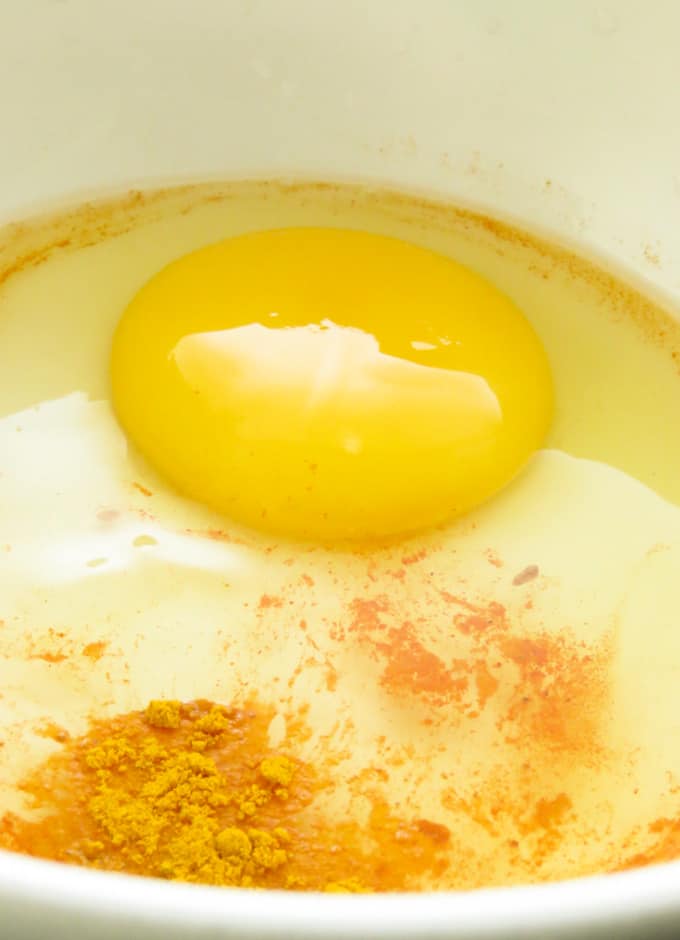
- Add the egg and turmeric into a bowl.
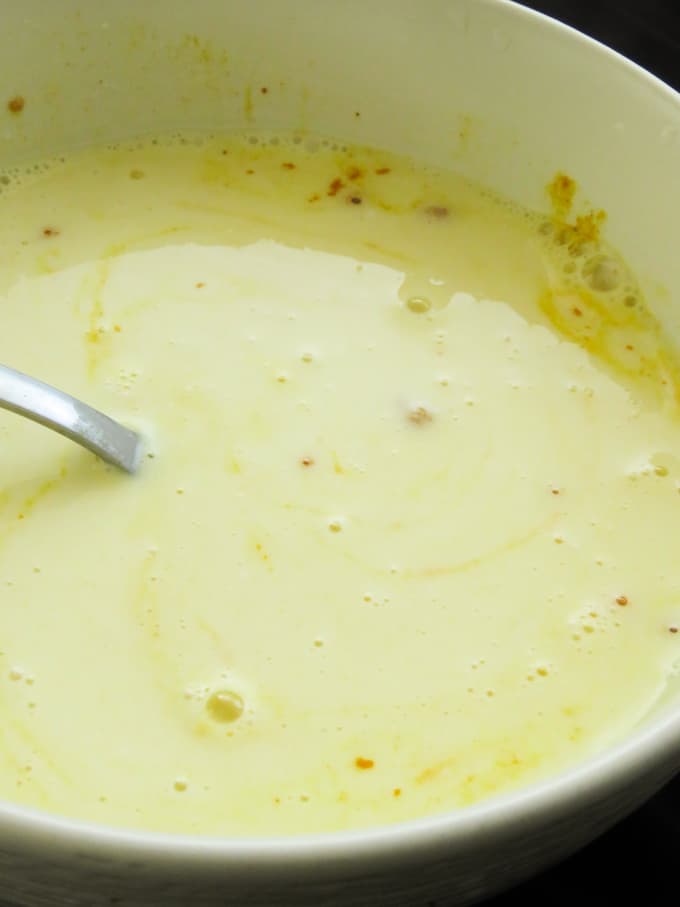
- Add the egg to the coconut milk, whisk until combined well.
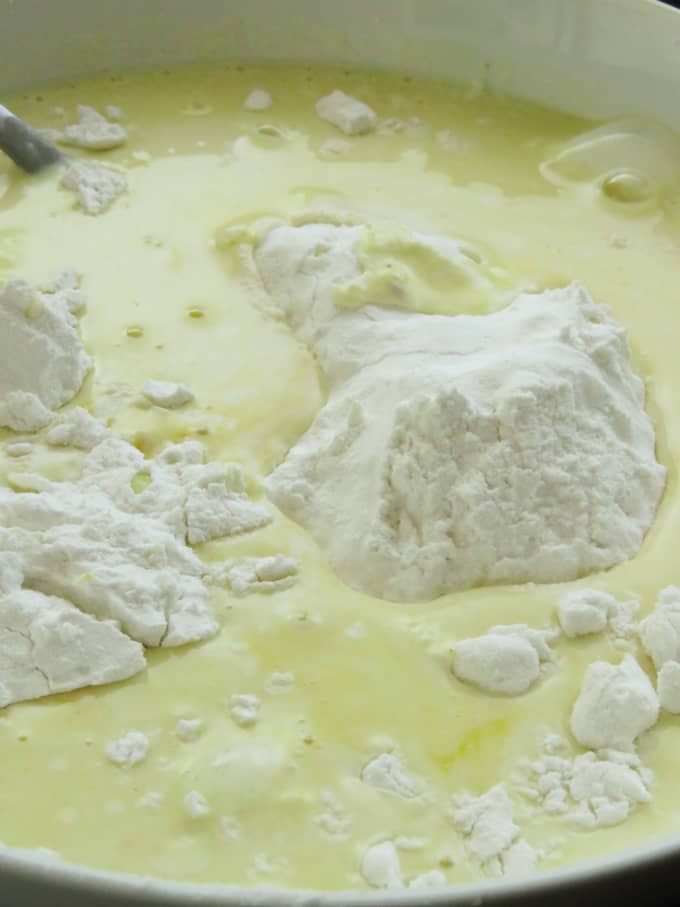
- Add the rice flour to the egg and coconut milk mixture and mix until you have a thick batter that would coat the rosette mould(read detailed notes above on batter consistency).
- Season with salt.

- Place frying pan over medium heat, dip the seasoned mould into the batter, make sure you don’t dip the mould all the way through but only half of the mould(see detailed notes above on dipping mould and seasoning the mould).
- Season with salt.
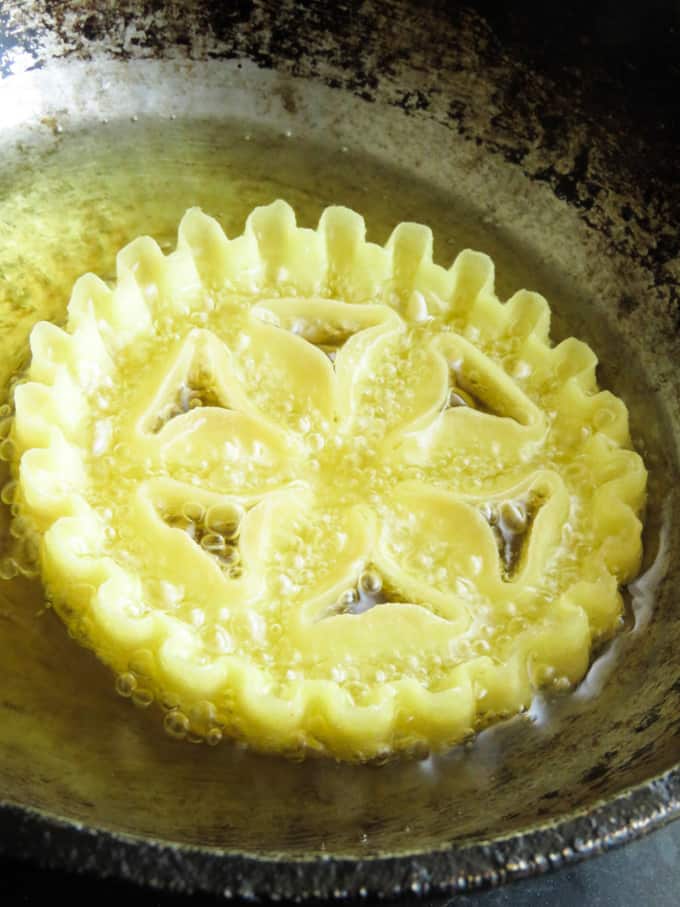
- Place a frying pan over medium heat, and dip the seasoned mould into the batter.
- Make sure you don’t dip it all the way through but only half of the mould (see detailed notes above on dipping and seasoning the mould).
- Once the kokis begins frying, 10 seconds into the frying, gently start bobbing the mould while the mould is still submerged in the oil.
- The bobbing movement should be a gentle up and down movement.
- You will notice the kokis slipping off. once rosette releases from the mould leave it to deep fry slow for a few minutes(3-4 minutes)until they turn golden.
- Remove from oil and place in paper towels to absorb excess oil.
- Before dipping the mould in the batter again make sure to cool it down if you are using just one mould (read notes above on how to do this).
- As you continue making the kokis, make sure to stir the batter frequently before you dip the mould.
- You will also notice the batter thinning as you use it, should this happen, add a tablespoon of rice flour to thicken the batter again.
Notes
Tips for making kokis.
As easy as the recipe and ingredients look on the recipe instructions, there are a few steps that can go wrong.
Here are key areas a beginner should look out for when they are making kokis for the first time.
- Kokis batter.
- Your main goal in getting the batter correct is to help it stick onto the mould, this is why you need a thicker batter than the usual crepe batter.
The mould.
- It is important to season the mould so the edges are smooth and the fried kokis slip off the iron rosette maker.
- For this reason, follow the instructions given above on the seasoning tips above.
Dipping the batter.
- DO NOT, I repeat do not dip the mould completely into the batter, you will not be able to remove the cookie from the mould.
- Instead, dip it halfway as shown in the image below.
The correct heat for the kokis.
- Maintain low-medium heat to fry, do not allow the oil to smoke.
- To make the rosettes crispy than soggy, fry them over low heat until they turn a light golden colour.
- If you do find them soggy it is the result of not frying them longer.
Removing the rosettes from the mould.
- Once you start frying, the task of removing it from the mould is the next difficulty.
- For this purpose, once the mould with batter is submerged in oil, 5-10 seconds into frying, start bobbing it up and down, this should help the rosettes fall off the moulds.
Repeating the process(Important).
- Once you’ve made the first kokis, DO NOT DIP THE HOT MOULD INTO THE BATTER.
- This would result in the batter cooking(see image below)with the remaining heat on the mould.
There are two solutions to this.
- Have an extra mould so you can use them alternately, allowing the one used to cool down before dipping into the batter.
- Have a damp towel close by to cool down the mould, if you are doing it this way, make sure to reduce the temperature of the oil so that it doesn’t reach a smoking point while you cool down the mould.
Now that we’ve covered all the difficulties you might come across making kokis, go ahead and give the recipe a try. all it takes is a little patience.
Recommended Products
As an Amazon Associate and member of other affiliate programs, I earn from qualifying purchases.
-
 Spice Container - Masala Dabba - 7 Compartments, masala box,steel masala dabba,Spice container box,stainless steel spice box indian masala dabba with 7 spice containers with size 8 X 8 inches (1)
 -
 Mueller HyperGrind Precision Electric Spice/Coffee Grinder Mill with Large Grinding Capacity and HD Motor also for Spices, Herbs, Nuts, Grains, White
 -
 Fullstar 9-in-1 Deluxe Vegetable Chopper Kitchen Gifts | Onion Chopper & Dicer | Peeler, Spiralizer, Zoodle Maker, Lemon Squeezer, Egg Slicer & Seperator- Ultimate Kitchen Gadget
 -
 Kitchen Shears, iBayam Kitchen Scissors Heavy Duty Meat Scissors Poultry Shears, Dishwasher Safe Food Cooking Scissors All Purpose Stainless Steel Utility Scissors, 2-Pack (Black Red, Black Gray)
 -
 EZ Off Jar Opener - Under Cabinet Jar Lid & Bottle Opener - Opens Any Size Jar - Great for Arthritis - Perfect for Seniors & Weak Hands
 -
 Chef Knife PAUDIN N1 8 inch Kitchen Knife, German High Carbon Stainless Steel Sharp Knife, Professional Meat Knife with Ergonomic Handle and Gift Box for Family & Restaurant
 -
 Prestige Manttra Omega Select Plus 200 Deep Fry pan, Kadai, Indian kadhai, Small, Black
 -
 Norpro Rosette/Timbale, 7 Piece Set
Nutrition Information:
Yield: 20 Serving Size: 1Amount Per Serving: Calories: 108Total Fat: 4gSaturated Fat: 2gTrans Fat: 0gUnsaturated Fat: 2gCholesterol: 9mgSodium: 46mgCarbohydrates: 15gFiber: 1gSugar: 0gProtein: 2g
Nutrition facts are an estimate and not guaranteed to be accurate. Please see a registered dietitian for special diet advice.
Each recipe on this blog has been written with great care and love to the best of my ability with you in mind.
It’s free and on the blog, for you to try anytime.
All I ask is that you do not save it on any apps, recipe boxes or online groups which will affect me as a food blogger and the growth of this blog.
I would appreciate it if you only share the link rather than the full recipe.
All images and text on this website are protected by copyright.
Sasha
Thursday 13th of April 2023
Amazing level of detail in these instructions! Thank you for all the efforts put in, it'll definitely help to get it right. I'm trying this tonight!
jehan
Thursday 13th of April 2023
You are most welcome. all the best with the recipe! Regards J
Avril
Thursday 30th of April 2020
What an excellent recipe and instructions. We make kokis every new year and always struggle with it. This time I followed your instructions to a T and I made perfect kokis from the very first one to the last. Thank you so much!!!
jehan
Friday 1st of May 2020
Hi Avril, Thank you for your feedback on the kokis recipe. your response helps me to write detailed recipes that helps the readers get it right the first time. You are most welcome! Regards, J