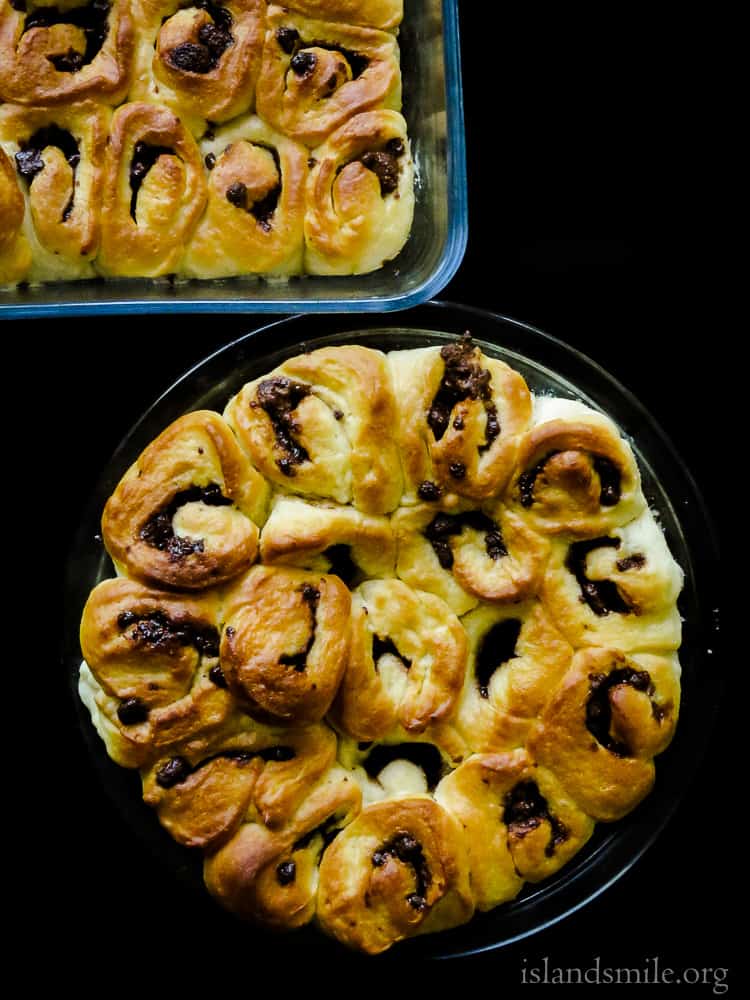
chocolate stuffed soft pull-apart bread made from scratch.
Make these better than bakery bought chocolate stuffed bread. a crowd-pleasing breakfast or tea time snack to enjoy.
Making soft, pillowy buns is an experience itself, not only do you feel a certain amount of satisfaction making baked goods that look complicated when you buy them but you’ll be surprised how often this soft bun recipe is used for your other favorite goodies like Chelsea buns and cinnamon rolls.
Once you start with your first baked goods like the pull-apart bread I’ve made here, you’ll no doubt fall in love with the process of making buttery soft bread and buns at home.
so to entice you with your first pull-apart bread, I would love you to try this chocolate-filled bun that I made a few times because the kids just loved it so much.

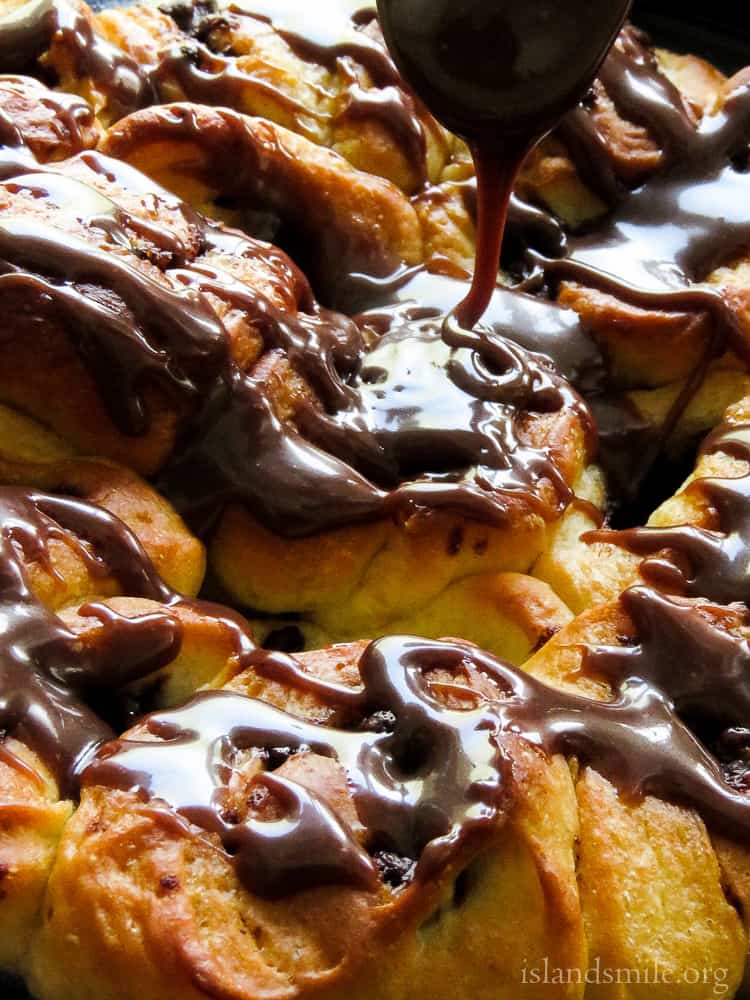
And if you want more chocolate on top of chocolate, drizzle spoonfuls of homemade easy condensed milk hot chocolate fudge sauce to make it a decadent treat.
Keep the following tips in mind for a successful bake of chocolate filled pull-apart bread.
1/ kneading the bread for 8-10 minutes is crucial to the success of a soft, light texture.
2/once the dough is filled and placed in a baking dish, make sure to cover and let the prepared dough rise for 30 minutes.
3/While placing the cut dough in the baking dish, leave enough space between the dough so they can rise without crowding each other.

Can I double the recipe to make a bigger batch?
Yes, you can double the following amounts to make a larger batch, just make sure to be careful with the Salt, every other ingredient can be doubled. for my third bake of these buns(did I mention how much the kids loved these?), I did double the ingredients with a little extra butter and made a big batch of these goodies without a problem.
Baking the chocolate stuffed pull-apart bread for breakfast.
If you want to make these buns for breakfast, start preparing the dough the night before, place the prepared dough in a bowl, cover with cling film and refrigerate.
In the morning, take the dough out of the fridge, leave it to reach room temperature, knead the dough for a minute then continue with recipe instructions from where you roll them out into a rectangle.

Save the recipe to your favorite Pinterest board!

Please make sure to read the recipe instructions carefully to avoid mistakes.
Ingredients
2 cups of bread flour
2 tablespoons of Sugar
1 teaspoon Salt
1 teaspoon instant yeast
1 tablespoon of cold butter(the following amount is for the dough, please make sure to have extra butter on hand to brush lightly on the baking dish as well as to apply on the rolled dough)
1/2 cup milk
1 large egg beaten
1/2 teaspoon of oil
1 cup of chopped cooking chocolate or chocolate chips, you can also use Nutella spread
Method
Forming the dough.
In a large bowl combine flour, Sugar, Yeast and Salt.
Once the above ingredients are mixed together, add cold butter, use your fingers to mix in the butter with all the other ingredients, until you get a crumbly mixture.
Into the same bowl, pour in the milk followed by the beaten egg and begin mixing all the ingredients to form a soft dough.
Using a push and pull action, continue to knead the dough for exactly 8-10 minutes or until the dough is smooth and elastic.
Once the dough is smooth, oil the same bowl or a separate bowl then lightly coat the dough with oil as well.
Place dough in the bowl and cover with cling film or a tea towel and store in a warm place for an hour.
Making the buns.
lightly butter an 8×8 baking pan or Pyrex dish and set aside.
Once the dough had risen, punch it down, knead lightly for a minute or two and then divide the dough into half.
Lightly sprinkle flour on a flat surface. roll the dough into a rectangle about 12×8 inch that is not too thin or thick.
lightly brush the surface of the rolled out dough with melted butter. avoid brushing the borders of the dough.
Sprinkle the finely chopped chocolate over the dough, spreading them evenly on the dough surface, then gently roll the long side of the dough towards you, tightly from one end to the other, as you reach the end, pinch both the edges together to secure the roll.
Using a sharp knife cut the long roll into thick rounds, you should roughly get about 9 pieces.
Place them on the buttered baking dish, making sure the side you cut is facing up, leave space between the pieces so they don’t crowd each other but at the same time become attached when they rise. cover with a cloth. leave it to rest for 30-45 minutes in a warm place to proof.
While the buns are proofing, preheat oven to 180C and bake for 20-30 minutes or until the top of the buns slightly turns golden in color. since various factors affect the temperature of the oven and baking time may vary by few minutes, the first time you bake the buns, I would advise you to keep an eye on the buns once they pass the 15-minute timeline. since I’m using a convection oven my perfect time to take out the buns out from the oven was between 20-25 minutes.
Remove the buns from the oven and lightly brush a bit of but over the top, let the buns cool and serve.

Chocolate-stuffed soft pull apart bread.
Make these better than bakery bought chocolate stuffed bread. a crowd-pleasing breakfast or tea time snack to enjoy.
Ingredients
- 2 cups of bread flour
- 2 tablespoons of Sugar
- 1 teaspoon Salt
- 1 teaspoon instant yeast
- 1 tablespoon of cold butter(the following amount is for the dough, please make sure to have extra butter on hand to brush lightly on the baking dish as well as to apply on the rolled dough)
- 1/2 cup milk
- 1 large egg beaten
- 1/2 teaspoon of oil
- 1 cup of chopped cooking chocolate or chocolate chips, you can also use Nutella spread
Instructions
Forming the dough.
In a large bowl combine flour, Sugar, Yeast and Salt.
Once the above ingredients are mixed together, add cold butter, use your fingers to mix in the butter with all the other ingredients, until you get a crumbly mixture.
Into the same bowl, pour in the milk followed by the beaten egg and begin mixing all the ingredients to form a soft dough.
Using a push and pull action, continue to knead the dough for exactly 8-10 minutes or until the dough is smooth and elastic.
Once the dough is smooth, oil the same bowl or a separate bowl then lightly coat the dough with oil as well.
Place dough in the bowl and cover with cling film or a tea towel and store in a warm place for an hour.
Making the buns.
lightly butter an 8×8 baking pan or Pyrex dish and set aside.
Once the dough had risen, punch it down, knead lightly for a minute or two and then divide the dough into half.
Lightly sprinkle flour on a flat surface. roll the dough into a rectangle about 12×8 inch that is not too thin or thick.
lightly brush the surface of the rolled out dough with melted butter. avoid brushing the borders of the dough.
Sprinkle the finely chopped chocolate over the dough, spreading them evenly on the dough surface, then gently roll the long side of the dough towards you, tightly from one end to the other, as you reach the end, pinch both the edges together to secure the roll.
Using a sharp knife cut the long roll into thick rounds, you should roughly get about 9 pieces.
Place them on the buttered baking dish, making sure the side you cut is facing up, leave space between the pieces so they don’t crowd each other but at the same time become attached when they rise. cover with a cloth. leave it to rest for 30-45 minutes in a warm place to proof.
While the buns are proofing, preheat oven to 180C and bake for 20-30 minutes or until the top of the buns slightly turns golden in color. since various factors affect the temperature of the oven and baking time may vary by few minutes, the first time you bake the buns, I would advise you to keep an eye on the buns once they pass the 15-minute timeline. since I’m using a convection oven my perfect time to take out the buns out from the oven was between 20-25 minutes.
Remove the buns from the oven and lightly brush a bit of but over the top, let the buns cool and serve.
Each recipe on this blog has been written with great care and love to the best of my ability with you in mind.
It’s free and on the blog, for you to try anytime.
All I ask is that you do not save it on any apps, recipe boxes or online groups which will affect me as a food blogger and the growth of this blog. I would appreciate if you only share the link rather than the full recipe.
All images and text on this website are protected by copyright.